Painting Kitchen Cabinets

By Kevin Sorby | Kitchen Designer & Cabinetmaker
With the right preparation, painting kitchen cabinets can be a highly successful and budget-friendly way to renovate your kitchen. However, as with any makeover, preparation is key. This means cleaning off all surface grease, properly sanding the doors and panels, and protecting your surfaces from paint splashes.
Painting Laminate & Melamine Doors
In this guide, we will focus on painting laminate and melamine kitchen doors and panels.
It is important to note that not just any paint will work. You must use a product specifically formulated to bond with melamine or laminate, which are the most common kitchen door materials.
Laminate-specific paint is designed to adhere to these surfaces and is available in a vast range of colors. While the process is straightforward, it requires patience; I recommend allowing one full weekend to complete a medium-sized kitchen.
Recommended Paint Products
For this project, we will be using White Knight products. Please note that the standard laminate paint has a satin finish; if you prefer a gloss finish, ensure you use 'Tile Paint' instead.
- White Knight Tile and Laminate Cleaner
- Whitely Knight Tile and Laminate Primer
- White Knight Laminate Paint (for a satin finish)
- White Knight Tile Paint (for a gloss finish)
Required Materials
- Safety gloves and mask
- Painter's masking tape
- #240 grit and #600 grit wet & dry sandpaper
- Small microfiber paint roller (4mm nap) and roller tray
- Painter's pyramids
- TSP (Trisodium Phosphate) for degreasing
- Clean sponges and cloths
- Bucket and drop sheets
Step-by-Step Guide to Painting Laminate or Melamine Cabinets
Step 1: Calculate your paint requirements. First, calculate the total surface area of your project. Multiply the length of your cabinets by the height to find the square meterage. Add up the total area for all wall, floor, and tall cupboards, then divide that total by 12 to estimate the number of liters required.
Step 2: Number your doors. Attach a piece of masking tape to the back of each door and write the corresponding number on it. This prevents confusion when re-installing them later. If you are painting the back of the doors, you can write the number inside the hinge hole instead.
Step 3: Remove hardware. Remove all door and drawer knobs or handles. Place them in a bag so they are not lost.
Step 4: Mask the edges. Apply painter's masking tape to the back of the door edges to prevent paint from bleeding around to the front. Note: If you are NOT painting the back of your doors, skip this step.
Step 5: Remove the doors. Unclip the door hinges from the hinge plates (or loosen the screws) and remove all doors. Remove all drawers and write their numbers on the underside of the drawer base.
Step 6: Protect your workspace. Use drop sheets to cover your kitchen benches and floors. Mask off any areas of the cabinetry that you do not want painted.
Step 7: Thoroughly clean the surfaces. To ensure proper adhesion, you must remove all traces of grease and dirt. Use White Knight Tile and Laminate Cleaner or a TSP solution. Spray the cleaner onto the surface and wipe with a damp sponge, working on one small area at a time. If the doors are heavily soiled, let the cleaner sit for 30 seconds before wiping. For stubborn dirt, a plastic scourer can be used.
Step 8: Sanding. Lightly sand the doors with #240 grit wet & dry sandpaper to create a "key" for the primer. Rinse with water and wipe with a damp sponge, then leave the doors to dry completely.
Step 9: Prime. Place your door on painter's pyramids to keep it elevated. Apply the White Knight Tile and Laminate Primer thinly using a small microfiber roller to the edges first, then use a zig-zag pattern to prime the face of the door. Let the primer dry for at least 4 hours before proceeding.
Step 10: Intermediate Sanding. Lightly sand the primed door face and edges with #240 grit sandpaper. Wipe off all dust with a damp cloth.
Step 11: Apply the first coat. Apply your White Knight Laminate paint using the same technique as Step 9. Allow it to dry for 2 hours.
Step 12: Final Sanding & Finishing Coat. Before the final coat, lightly sand the door with extra-fine #600 grit sandpaper. Wipe off all dust. Apply the final coat using the method in Step 9 and allow it to dry completely for 8 hours.
Step 13: Re-assembly. Re-attach your doors and drawers to the cabinets and reinstall your hardware. Your transformation is complete!
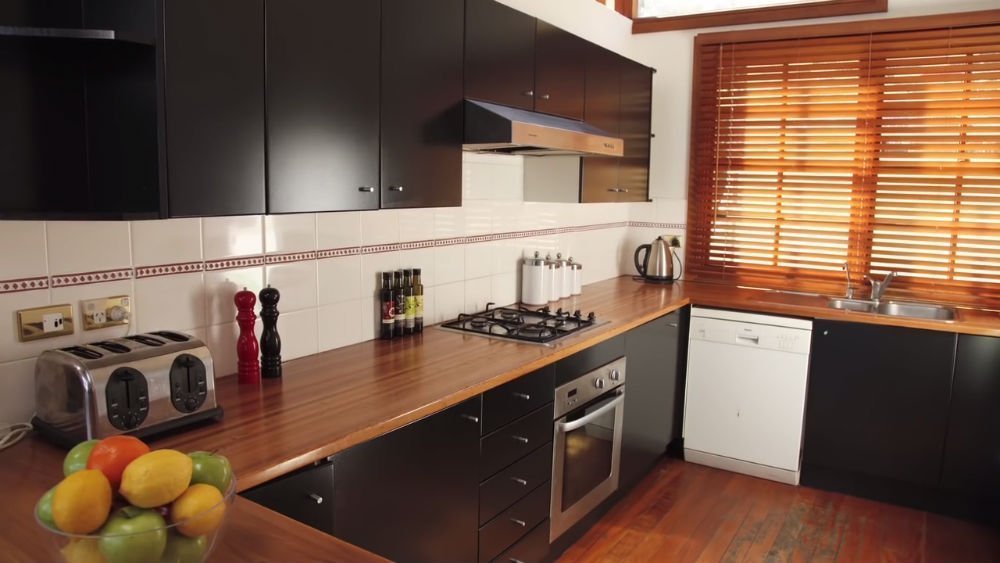
Who knew painting kitchen cabinets could be so easy? Your tired old kitchen has been totally transformed! Remember: Handle the freshly painted doors carefully for the first 7 days to allow the paint to fully harden. For more information on specialist paints, visit White Knight Paints.
Find this guide useful? Press Ctrl + D (Windows) or ⌘ Cmd + D (Mac) to bookmark it for quick reference!